Gluten Free/Dairy Free Biscotti with Pistachio & Winter Citrus
Prep time
Cook time
Total time
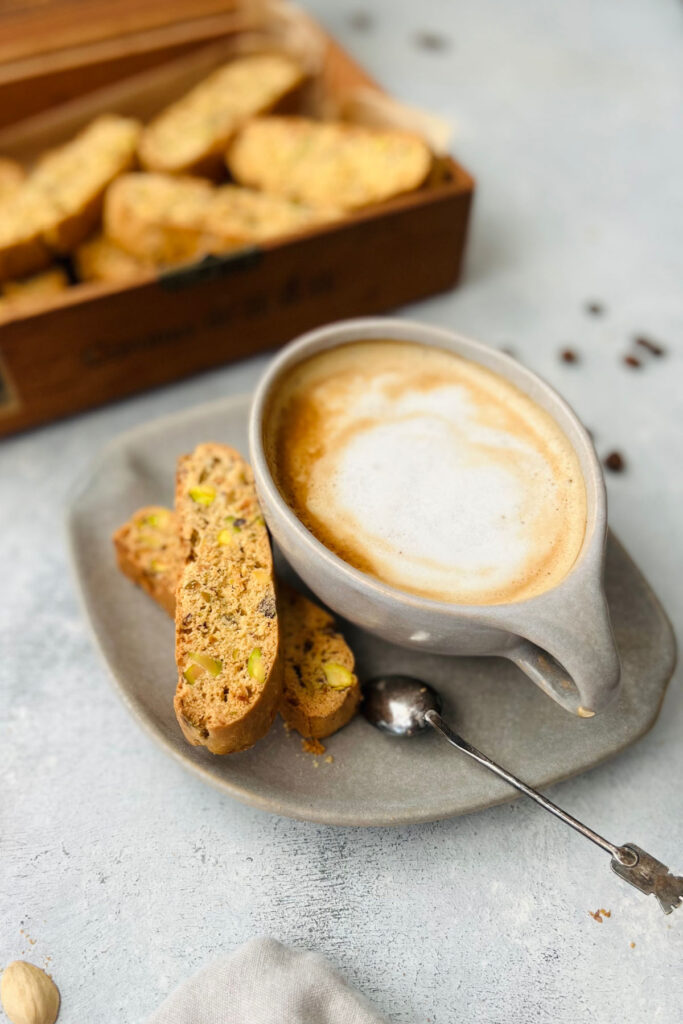
These delicious pistachio & winter citrus biscotti embody the characteristic crispiness and satisfying denseness of the traditional Italian biscuit ~ irresistible and perfect for dunking in warm autumn/winter beverages!
Author: kelly
Serves: 20-24 biscotti
Ingredients
- 240 g (2 not-quite full cups) all purpose gluten free flour (I'm using Bob's Red Mill)
- ½ Tbsp xanthan gum (if your GF flour already contains xanthan gum, simply skip)
- 2 tsp baking powder
- ⅛ tsp salt
- 2 eggs
- 65 g (about ⅓ cup) packed granulated sugar (I like the texture of brown sugar for this)
- 6 Tbsp olive oil
- 2 Tbsp lemon or orange zest
- 1 tsp vanilla extract
- 1 cup shelled pistachio, chunky chop (not too small) I recommend shelling your own for the freshest tasting and most vibrant colored nuts
Instructions
- Preheat oven to 375F
- In a medium sized mixing bowl, combine: gluten free flour, xanthan gum (if your GF doesn't contain any), baking powder and salt; set aside.
- In a larger mixing bowl, beat the olive oil, sugar, lemon zest and vanilla together until well combined -- (I use a hand mixer for this which is especially helpful when adding the flour);
- Add eggs, one at a time, beating well between additions - the mixture should be lighter and brighter at this stage.
- Slowly add the flour mixture in increments -- the batter will become progressively stiffer (a blender is helpful) and sticky - turn off the mixer once all the flour is mixed in. Add the pistachios to the bowl, using a spoon or bowl spatula etc. to combine the nuts as best you can (it will be hard/sticky, that's expected).
- Using a pastry scraper, divide the dough in half (just eyeball it, doesn't have to be perfect) and invert each half onto a silpat lined baking sheet (non-stick/slip liner) image #3//first quadrant - nb: don't try to do this on a parchment sheet it will be too slippy and drive you bonkers) -- now use your hands to shape and pat each bundle of mixture into a log (approx 8" x 3½ " x ¾") image #4//first quadrant-- if the dough is too sticky to handle, add a little bit of water to your hands (not more flour) and continue to shape the dough, this is a great trick for working through the stickiness just don't soak your hands (and the biscotti) with water, a little goes a long way!
- Once your logs are in place, pop the baking sheet into the 375F oven for about 20 minutes until the logs have puffed up and have become to acquire a golden exterior (image #1//second quadrant) -- that exterior is important for the texture/crunchiness of these biscotti,
- Remove the baked logs from the oven and allow them to cool on a rack for 10 minutes (set a timer).
- Reduce oven temperature to 325F.
- After 10 minutes, slice the biscotti logs into (roughly) ½" slices (image #2//second quadrant) and place each piece, slice down, back on the silpat (image #3//second quadrant).
- Return to oven and bake for 10 minutes before flipping the biscotti over, and baking another 10 minutes on the other side. Your biscotti should now be dry and have some golden color on both sides (image #4//second quadrant) -- keep an eye on them, you don't want them to over-brown. Remove the biscotti from the oven and allow them to cool before enjoying.
- Store biscotti in an airtight container for up to one month or freeze in a suctioned freezer bag for best longevity. If your freezer space allows, you can also store in an airtight container with parchment paper.
Recipe by Inspired Edibles at https://www.inspirededibles.ca/2022/11/winter-citrus-biscotti.html