Inspired Edibles

~ wellness, wonder, words ~

  • Home
  • Welcome ❥
  • Inspire
  • life
  • Index
  • Contact
  • Privacy Policy

Strawberry Balsamic Crostini with Ricotta & Fresh Basil

May 7, 2014 By kelly / inspired edibles 10 Comments

Well, 9 months later and I’ve finally decided to bite the bullet and join a ‘meetup’ group in my ‘hood.

As much as I love the plants and my doggie (who I must say has been the best darn friend a girl could ever ask for during this life transition), it’s time for this recluse to spread her wings and break new ground.

I set up my profile and bio and even supplied the requested headshot.  Despite feeling a twinge of discomfort the way you would if you were signing up for a dating service, I smiled when all was said and done and feel ready for this new challenge.  It’s been about ten years since I’ve actively engaged in a creative writing process of this kind — the kind where you read your work out loud into a painfully silent room and feel the vibration of your hands shaking and your voice cracking with every word. The kind where warm and supportive folks greet your tortured prose with effusive feedback to be replaced, eventually and properly, by frank critique. Awwwkward, says my eldest.  Maybe so, but fun too. And he forgets that I did this for years when he was just a nibblet (although I will say, the group sure seems a lot younger than they did a decade ago! Ha, good thing writing is ageless).

~~~~~~~~~

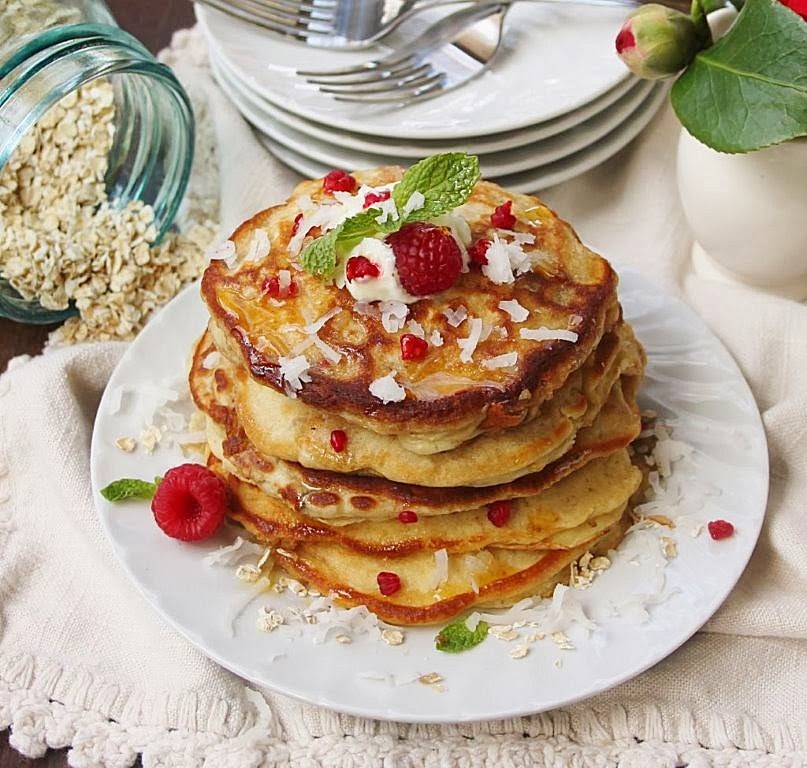
So I have a tasty and seasonal little yummy for you today that I thought might work very well as a mother’s day appetizer during cocktail hour or on the brunch table.  A very simple and colourful twist on traditional bruschetta that packs some delicious flavour.

If you like the idea but prefer to skip the bread, I’m happy to report that this spread works beautifully on sliced cucumber. Cucumber is firm enough to grasp as finger food and provides a perfect platform for the cheese and strawberry mixture.  It’s also resilient enough not to soften, the way bread does, from the wet mixture.  I actually loved the cucumber version.

Cheers to a wonderful weekend and to mothers of all ages and stages around the globe. Those who are still with us and those we carry in our hearts.  We are all born of mothers ♡.

Strawberry Balsamic Crostini with Ricotta & Fresh Basil

Strawberry Balsamic Crostini with Ricotta & Fresh Basil

  • 24 (or so) crostini or cucumber slices 
  • 8 or so large fresh strawberries, coarsely chopped
  • 1/2 avocado, diced
  • 1/2 cup ricotta cheese
  • 3 Tbsp (45 mL) balsamic vinegar
  • 1 Tbsp (15 mL)water
  • 2 tsp (10 mL) maple syrup (or honey)
  • 1 Tbsp (15 mL) fresh basil, finely chopped plus more for garnish
  • Sea salt and cracked black pepper

Makes about 24 crostinis/cucumber slices

Nutrition & Cooking Notes:

  1. For the crostini, I used toasted asiago sourdough baguette slices from Boudin out of San Francisco but naturally, you can use any bread or cracker of choice here.
  2. Keep in mind that the strawberries do carry moisture and that the bread/crackers will eventually soften under this influence.  It’s best to prepare these crostinis just shortly before serving. (The sauce itself will age nicely in the fridge but not on the bread/cracker).
  3. The longer the berries marinade in the fridge, the darker they will become.  So you will lose some of the vibrant red colour but you will gain exquisite flavour ;-).
  4. Sliced cucumber is more resilient than bread (will stay firmer longer) however it too will do best prepared shortly before show-time.
  5. I have provided the nutrition facts for both the bread/crostini version and the cucumber version.

Directions:

  1. In a medium sized bowl, combine: balsamic, water, maple syrup (or honey) and chopped basil.
  2. Add the strawberries to the balsamic mixture, stirring to combine and then store in the fridge for a minimum of 30 minutes and up to 4 hours.  The longer the strawberries marinade, the darker they will become so you will lose some of the vibrant color but you will gain some wonderful taste ;-).
  3. When you are ready to serve the berries, spread 1 or 2 tsp of ricotta cheese onto each crostini or slice of cucumber.  Top the cheese with a touch of sea salt and black pepper.
  4. Using a slotted spoon or simply draining most of the balsamic juice with a small spoon, scoop a heaping tsp or two of the strawberry balsamic mixture onto the crostini or cucumber.
  5. Add a few pieces of chopped avocado along side the strawberries and garnish with more basil, as desired. As simple and glorious as that!
  6. I have two nutrition panels today representing the crostini and cucumber version.  Can you guess which is which? :o)
       
© Inspired Edibles


ღ༺✿ ✿༻ღ
Hundreds of dewdrops to greet the dawn,
Hundreds of bees in the purple clover,
Hundreds of butterflies on the lawn,
But only one mother the wide world over.
~ George Cooper

Filed Under: Appetizers and Starters, Breads Muffins and Loaves, Snacks and Dessert

All Natural Mixed Berry Chia Jam

April 24, 2014 By kelly / inspired edibles 15 Comments

If you want to delight your guests and loved ones with a beautiful, delicious and succulent seasonal jam, have I got the thing for you!

Even better? This version is brimming with nutrients and will only take you about 10 minutes to whip up (yup, that’s right, 10 minutes!).  Oh and don’t worry, I won’t tell a soul… your domestic goddess status is safe with me.

I’ve always relished the idea of jam but rarely eat it because most commercial brands and home preserved varieties are more about the added sugar than the fruit.  It’s a real shame too because fruit contains so much natural goodness (and plenty of sweetness), it doesn’t actually require much messing.

But how to create a jam without the pectin and the heavy sugar load needed to activate it?

That’s what I love about this recipe.  It allows the taste and the star quality of the fruit to shine through without bogging it down with additives/preservatives.  Chia seed is a natural gelling agent and a perfect fit for this raw, natural variety of homespun jam. Chia also brings with it an array of nutrients to complement the fruit, which you can read more about in the Nutrition & Cooking Notes.

The other fun thing about this recipe is that you can choose (and vary) the fruit according to its seasonal availability to create a different taste experience each time. Chia works particularly well with berries because the tiny seeds mimic those natively found in the fruit but you could certainly experiment with other pulsed fruit (or ideally a combination of berry and other fruit) and see how the resulting texture appeals. With something this easy, it’s not much of a stretch to imagine creating a new variety every week.  And now that the warmer months are finally upon us [yay] it’s nice to support local growers and benefit from fruit at its peak of freshness and nutrient quality whenever possible.

By the way, I also think these little jam jars would make a gorgeous hostess or mother’s day gift!

No?

All Natural Mixed Berry Chia Jam 

All Natural Mixed Berry Chia Jam

  • 8 – 12 (about 150 grams) plump, juicy and happy fresh strawberries
  • 1/2 cup (80 grams) dazzling fresh blueberries
  • 1 Tbsp (15 mL) orange juice
  • 1 Tbsp (15 mL) orange zest, optional
  • 1 Tbsp (15 mL) pure maple syrup
  • 1 tsp (5 mL) vanilla extract
  • 2 Tbsp (30 mL) chia seed

Makes about 1 cup of mixed berry chia jam (6 servings)

Nutrition & Cooking Notes:

  1. Chia Seed: Chia seeds offer plant-based omega-3 fatty acids, fibre, antioxidants and an impressive array of minerals. Unlike flaxseed, chia does not have to be ground to be bioavailable (ie: to be absorbed and usable by the body). Flaxseed has a similar nutrition profile to chia (with slightly less fibre, omega-3s and minerals per serving) but flaxseed has the added benefit of containing lignans – plant compounds believed to be protective of breast health – which chia does not.  Chia is more expensive than flaxseed but due to the highly concentrated nature of its nutrients on a gram per gram basis, a small amount of chia goes a long way. You can find chia seed at any health food store and many larger grocery stores.
  2. Fresh & Frozen Fruit: Chia works particularly well with berries in this recipe because the tiny chia seeds mimic those found natively in the fruit but you can certainly experiment with different pulsed fruit (maybe a combination of berry and other fruit such as apple, peach, plum or apricot for example) and see how you like the resulting texture.  Frozen berries will work here but you may need to thaw them first and allow some of the moisture to drain. You can also increase the amount of chia seed to enhance gelling effect if there is a higher moisture content from the frozen fruit.  Again, some experimentation may be required.
  3. Citrus, Spice & Fresh Herbs: You can play around with different varieties of citrus including lemon, lime and orange and add other flavorings such as cinnamon, clove, cardamom, anise and ginger. Fresh herbs such as basil, thyme and mint can also add a zing factor.
  4. Not a Preserve: It’s important to note that the featured recipe is a raw, fresh food jam that does not contain any additives or preservatives. This particular jam is not suitable for canning or long term storage.  It should be kept in a container in the fridge and enjoyed within one week.

Directions:

  1. Combine: strawberries, blueberries, orange zest, orange juice, honey and vanilla extract in a blender or food processor.  Pulse briefly until desired consistency is achieved.  For a chunky jam with pieces of fruit still visible, you will only need two or three pulses.  This will also allow the blueberry to appear distinct from the strawberry which is quite beautiful.  If you prefer a more uniform colour and a smoother texture, continue pulsing until desired consistency is achieved.
  2. Transfer fruit mixture to a suitably sized bowl and add chia seed, mixing with a wooden spoon to combine.  Your fruit mixture will gel relatively quickly but I like to leave the mixture in the fridge for about 2 hours before serving for an ideal jam consistency.  You can store the jam in a glass mason jar in the fridge or any covered container to be consumed within one week.
  3. Keep in mind that this is a raw, fresh food jam that does not contain any additives or preservatives. This particular jam is not suitable for canning or long term storage.  It should be kept in a container in the fridge and enjoyed within one week.  With a recipe this simple, you can make a new variation every week and take advantage of seasonal fruit and herbs from your garden throughout the summer!
© Inspired Edibles


my favourite way to enjoy this jam is on my morning oatmeal ♡

Filed Under: Breakfast, Snacks and Dessert, Uncategorized

Homemade Gummy Bunnies!

April 15, 2014 By kelly / inspired edibles 22 Comments

gummy-bunnies_blog_main1[1]
We’re just getting back from a little road trip down the coast (LA) and into the southeastern interior of California (Mojave/Colorado deserts), Arizona (Flagstaff, Grand Canyon) and Nevada (Vegas).

We drove over 2 thousand miles in 4 days but it was worth every neck cramp, backseat brawl, and early morning rise. There was a jacuzzi at dawn in a pine forest (complete with a visit from a wild rabbit), roadside frisbee under dark desert skies and some rather colorful scenery on the Strip to keep us all amused. There was also an amazing night of eats and entertainment to kick it all off here.

So while I gather and organize the photos from our trip and we settle back into school, work and life, I’m sharing a simple and festive recipe for homemade gummy candy with you today!

If you like gummies (or know someone who does), this is a really fun idea — you can use any mold you like and with all the online shopping options that exist these days (read Amazon), it’s easier than ever to find just about any shape, size or theme you’re looking for (and quick delivery too ;-), so have fun exploring.

I strongly recommend that you seek out silicone molds wherever possible because they make the task of unmolding – which turns out to be not such a small task at all – much (much) easier. You can certainly make this recipe using a traditional chocolate/candy mold (plastic) as I have done here but you might find yourself pulling out your hair and a toenail in the process.  I have included tips in the Nutrition & Cooking Notes below to guide you through the later, just in case.

This recipe uses only four basic ingredients with a base of natural fruit and vegetable juice.  I went with a company headquartered around the corner from us here in Half Moon Bay but you can work with any quality juice of preference.  The resulting gummy candy is slightly softer than the commercially processed candy but I think we can agree that’s not a bad thing.  My teenage boys had no trouble gobbling these love bunnies up. Hope you and yours enjoy them too!

Homemade Gummy Bunnies

Homemade Gummy Bunnies!

Per Batch (use a different colour/type of juice for each batch):

  • 1/2 cup all natural fruit or vegetable juice
  • 4 Tbsp fresh lime or lemon juice 
  • 1 Tbsp honey or pure maple syrup
  • 2 Tbsp unflavored gelatin powder dissolved into 4 Tbsp boiling water, (consider agar-agar for a plant-based gelling agent)


Each batch makes approximately 50 mini bunnies (using a 1-1/8″- 1-3/8″ by 1/4″ mold) 

Nutrition & Cooking Notes:

  1. As mentioned above, silicone molds are preferred for unmolding however if you cannot find one you may wish to gently spray the interior of a candy/chocolate (plastic) mold with a touch of olive oil before pouring the gummy mixture. This will help enormously with unmolding. A little dab will do and you can work the oil into all the nooks and cavities of your mold with your index finger.  The oil taste dissipates quickly once the candy is unmolded.  The trick is to allow the gummies to get nice and cold/hard in the fridge before trying to release them (doing otherwise is an exercise in complete frustration that may lead to inadvertent utterances ;-).
  2. Choose an assortment of fruit and/or vegetable juices as desired for your base.  Some natural juices have extraordinary colours, so you can really have fun with it.  I used mango, carrot, strawberry and blueberry. Adding the lime/lemon can change the colour of the juice (tends to make it lighter) but that too can create a beautiful effect. We found the carrot juice really dazzling.
  3. If you like your gummies on the sour side, and who can blame you, adding more lime or lemon juice is the trick. The current recipe offers a little kick but if you prefer predominantly sour, you can increase the citrus content relative to the juice base (try a half cup lime or lemon and a quarter cup frut/veg juice) for a more pronounced pucker effect ;-).


Directions:

  1. Be sure to have your molds ready as the gelatin will set fairly quickly once added to the juice mixture.  If you are using a plastic mold, you may wish to gently spray the interior with olive oil to assist with unmolding – just a little dab will do and you can work it into all the nooks and cavities of your mold.
  2. In a small bowl, dissolve 2 Tbsp of gelatin powder into 4 Tbsp of boiling water – whisk the gelatin until it is fully dissolved into the water.  Set gelatin slurry aside to hydrate (or ‘bloom’).
  3. Meanwhile, place fruit or vegetable juice of choice in a bowl and whisk in lime (or lemon juice) and honey (or maple syrup).
  4. Give the gelatin slurry a final whisk before adding it to the juice mixture, whisking to fully integrate.
  5. Working quickly but carefully, transfer the mixture into a pouring device (I used a large measuring cup with a pouring snout) and begin pouring the gummy mixture into the molds just until almost full.
  6. If the mixture solidifies before you have finished pouring it into the molds, you can reheat the remaining mixture in a pot on the stove top for a moment and continue pouring.
  7. Allow the mold/s to sit for a moment before carefully transferring to the fridge and allowing the gummies to solidify fully before unmolding (the gummies should no longer be sticky when you touch the backs).  If you are pressed for time, you can cool the molds in the freezer but be careful not to burn the little guys.
  8. We find the gummies store best in an airtight container in the fridge.
  9. The nutrition facts below are based on a generic all natural mixture of fruit juice (not a particular brand).
© Inspired Edibles


Filed Under: Snacks and Dessert

Garlicky Bean Dip with Chipotle Spiked Tortilla Chips

April 3, 2014 By kelly / inspired edibles 17 Comments

We had our first serious rainfall this week.  And that’s a good thing.

Up until now, we have had the occasional sprinkling of rain but it never seems to last for more than a few minutes and doesn’t really amount to anything.  Even in the heart of so-called rainy season, I can count on one hand the number of times the sky has opened up. It makes me wonder how California manages to thrive environmentally and agriculturally in the clutches of this largely desert climate.

The drought conditions have been so severe this year that it was threatening to work it’s way into the state’s water drinking supply.  Some experts were warning that we were on track for the most severe drought in over 500 years.

So when it rained this week — and it rained hard — it was both a relief and a blessing.

It was also a perfect excuse to hang out in my puffy slippers (a thing of rare beauty I tell you) and cook up a batch of these warming chipotle chips with chunky bean dip!

Bean purée is one of the most well-loved ingredients in my kitchen.  We enjoy it not only as a dip with veggies and crackers but also as a spread in sandwiches and quesadillas that make a regular appearance in the boys school lunches.  Versatile, nutritive and delicious, you can use any bean you like in this recipe and play around with herbs and spices to achieve the flavours that work best for you and your family.  One serving of this bean & tortilla snack delivers over 10 grams of protein, 7.5 grams of fibre and barely a trace of sugar.  Healthy snacking at its best.

I do recommend cooking your own beans which I recognize is more time-consuming however most pre-cooked beans continue to be sold in tin cans that are lined with BPA, a known toxin.  (See my Nutrition and Cooking Notes for more information).

I tend to cook beans while I’m doing the dishes, preparing lunches, or cooking a different meal.  That way, my time is well spent and I don’t feel like I’m standing there for 45 minutes watching paint dry.  Cooked beans store beautifully in a covered container in the fridge.

Enjoy and Cheers to Mother Nature.

GARLICKY BEAN DIP WITH CHIPOTLE SPIKED TORTILLA CHIPS

Garlicky Bean Dip with Chipotle Spiked Tortilla Chips

For the Bean Dip (will create 5 cups cooked beans or 4 cups bean purée)
  • 2 cups (500 mL) dry beans of choice (I used kidney beans however any bean will work)
  • 4-6 garlic cloves, coarsely chopped
  • 1/2 cup (125 mL) (or so) water
  • juice of one lemon
  • 2 Tbsp (30 mL) olive oil
  • pinch sea salt & coarse pepper
  • optional, handful cilantro
For the Chipotle Chips (will create approx 80 chips)
  • 2 large soft flour tortillas (any variety of flour will work), cut into 1+1/2″ sized pieces or so
  • 1 Tbsp (15 mL) olive oil, drizzled or sprayed*
  • 2 tsp (10 mL) chipotle chili powder 
  • 1/2 tsp (2.5 mL) smoked paprika
  • 1/2 tsp (2.5 mL) garlic salt (with parsley) or simply sea salt


Serves 8 

Nutrition & Cooking Notes:

  1. Bean Type: You can use any bean or lentil of choice here — chickpea, black beans, cannellini bean, black-eyed peas, lima beans, pinto beans, etc. — and incorporate different herbs and spices to enhance flavour.
  2. Why Cook your Own Beans: Canned beans are always an option however, in addition to having a superior taste and texture, I favor dried beans because of ongoing health concerns surrounding Bisphenol A (BPA).  BPA is a known toxin that continues to be used in the lining of many food and beverage cans – including canned beans.  Studies have shown that this industrial plastic is absorbed by canned foods and, when ingested by consumers, can give rise to significant spikes in urinary levels of BPA.
    Canada was the first country in the world to declare BPA a toxic substance after reviewing a substantial body of evidence that linked BPA, and its estrogen mimicking effects, to a variety of troubling diseases and disorders including prostate disease, breast cancer, fertility problems and neurological issues, including fetal and infant brain development.

Health Canada has banned the industrial chemical from plastic baby bottles (as has the European union), but has not extended this ban to include food and beverage cans, which critics continue to argue is necessary to ensure public safety. Until more studies are conducted, I continue to take a cautionary approach by reducing our exposure to BPAs as much as possible.

  • Health Benefits of the Lowly Bean: Often neglected, beans deliver potent health benefits including assisting with blood sugar regulation, lowering cholesterol and blood pressure and guarding against cardiac incidents.  They are an excellent source of quality carbohydrate, fibre and protein as well as delivering numerous vitamins and minerals (notably folate, magnesium and iron).
  • Soaking Beans prior to Cooking: it is generally recommended to soak dry beans before cooking them to rehydrate prior to cooking. This not only facilitates the cooking process it may also ease the common digestive distress associated with eating beans.  You can simply soak your beans overnight in a pot of covered water to achieve this.  In the morning, simply drain the water and rinse.  You can also use a quick soaking method which is to boil the beans in water for 2 minutes, remove from heat, cover and let stand for an hour.  Drain and rinse. (For 2 cups of beans, soak in 6-8 cups water for either method).
  • Olive Oil Spray: I like using olive oil spray for the tortilla chips because it covers a broader surface with a lighter coating of oil than can be generally achieved by drizzling the oil.
  • Nutrition Facts: The Nutrition Facts panel below is based on a serving of both the bean dip & the tortilla chips.


Directions:

Heat oven to 375 F.

  1. Cook pre-soaked beans according to package directions (usually 3 or 4 cups of water per 1 cup of beans).  NB: 2 cups of dry beans will create 5 cups of cooked beans or 4 cups of bean purée.  You will likely have bean purée leftover from this recipe for future use. Soaking beans prior to cooking is recommended to rehydrate the bean and facilitate the cooking process.  
  2. Cut the flour tortillas into roughly 1 + 1/2″ pieces using any shape you desire (triangles or rough squares as I have done here work well).
  3. Place the tortilla pieces (there should be about 80 of them) in a large bowl. Spray (or drizzle) olive oil over the tortilla pieces and, using your hands, work the oil into the surface areas as thoroughly as possible.
  4. Sprinkle the oiled tortilla pieces with chipotle, paprika and salt again working the spices into the surface area of the tortillas.
  5. Line a baking sheet with parchment paper and spread the tortillas out such that they are not touching each other (use a second baking sheet if necessary).
  6. Place the tray in the oven and bake the chips for 5-8 minutes (ideally shaking the pan once if you think of it) just until the chips are crispy and fragrant without being over-done.  Cooking time will vary depending on oven temp.
  7. Meanwhile, strain cooked beans in a colander and rinse thoroughly.  Placed cooked and strained beans in a blender or food processor and add garlic, half the water, lemon, olive oil and seasonings. 
  8. Blend the beans to desired consistency, adding more water as necessary.  Sample and adjust seasonings as desired. I like a chunkier bean dip with pieces of bean and garlic poking through so I don’t fully blend to a purée.  If you like a smooth and creamy bean consistency, simply blend to desired uniformity. 
  9. Nutrition Facts below include both bean dip & tortilla chips.
© Inspired Edibles


Filed Under: Appetizers and Starters, Lentils and Legumes, Snacks and Dessert

Flourless Double Chocolate Almond Butter Cookies (Gluten Free, Dairy Free)

March 11, 2014 By kelly / inspired edibles 28 Comments

Imagine my surprise getting an email from my son’s drama director last Tuesday advising of a costume parade that my son was appearing in on the Thursday.


So far so good, right?


Except…this:


“The costume parade is a chance for the director and the costume committee to see what the costumes look like and make any needed additions or changes.”


Hmmm….


He wouldn’t have… He couldn’t have…

Two gentle email inquiries later, and then (every mom’s fear), this confirming reply:


“Your son should have brought home a complete costume outline for you over a month ago.”


Is that right.


*&^/##/^%$#**!?!?


Of all the charms and gifts our youngest may be endowed with, passing along school communications is not his strong suit.


But perhaps most stunning is the way he handled it all with a calm and grace that was positively disarming. Because, let me tell you, the fur was flying. In his characteristic way, he reassured me (by text) that I didn’t have to worry about a thing.  No. All was under control and that he had been ‘quietly’ gathering his costume and had ‘planned’ on talking to me about the ‘finishing touches’ tonight or tomorrow night. Then, the coup de grâce, he arrives home with a giant almond-studded dark chocolate bar for his mom. (The little bugger played me like a fiddle).


But wait, it gets better.


Fast forward to the weekend and I’m quietly fretting because my husband and I are heading to San Jose to catch a hockey game, our eldest is out of town for the weekend and that means our youngest has to travel home from his evening rehearsal by himself.


Well, I must have gone over the safety protocols once too often because he eventually sat me down and asked if we could do a mindful meditation together (I kid not. He’s taking a mindfulness class in grade 8 – how great is that?).


I studied Buddhism for four years (spot the difference) but nothing could have prepared me for the tenderness of this moment.


He asked me to close my eyes and locate my breath.  This, he explained, was my ‘anchor’ “now take a few deep breaths from your anchor and feel yourself starting to relax.  If you find that your thoughts start to wander, that’s ok, you can notice that but then just bring your thoughts back to your anchor and continue.


And if you start worrying at the game tonight mom, just find your anchor and start breathing again.”

♡

~~~~~

I still can’t get over how these simple and unconventional ingredients come together to create a legitimate cookie!  Soft and springy on the outside, moist, dense and fudgy on the inside.  Magic.


I’ve come across many flourless cookie recipes that are held together by 2 and 3 cups of sugar, which seems a little counter-productive, so it’s especially nice to know that these are made up of healthful ingredients with only 3 Tbsp of added sugar in the entire batch! Two of these cookies (a snack sized serving) supplies more protein than an egg. And guess what? You won’t be disappointed with the taste either. They are *so* yummy.


Please read the Nutrition and Cooking Notes for options and best results.

Flourless Double Chocolate Almond Butter Cookies


Flourless Double Chocolate Almond Butter Cookies (Gluten Free, Dairy Free)

  • 1 cup (250 mL) well mixed all natural smooth almond butter (just nuts, sugar free, sodium free)
  • Heaping 1/3 cup (80 mL) quality unsweetened cocoa powder
  • 1 large ripe banana
  • 2 tsp (10 mL) vanilla extract
  • 1 egg
  • 3 Tbsp (45 mL) pure maple syrup or honey
  • 1/3 cup (80 mL) quality dark chocolate chips* + a few more for topping
Makes about 20 cookies

Nutrition and Cooking Notes:
  1. You can use any nut or seed butter of choice in this recipe but be sure to mix the nut/seed butter thoroughly before measuring it out so that the oil is well integrated and the mixture is creamy (otherwise, you may end up with too much oil and a flat cookie).
  2. There are endless ways to enhance (or change) the flavour of these cookies: a drop of peppermint extract, almond extract, a pinch of espresso, a dash of chile pepper, some citrus zest, etc. – have fun with it!
  3. I’ve tried playing around with quantities and substitutions in this recipe (reducing the nut butter; adding some coconut oil; substituting apple sauce for the banana) but nothing seems to work quite as well as the original recipe.  There is a certain magic to the chemistry of these ingredients but as always, feel free to experiment, and do let me know if you have some success!
  4. This cookie batter is best baked all at once.  Even if you don’t plan on eating 20 cookies, I recommend baking the entire batter and freezing or reserving the baked cookies for later use rather than saving half the batter as it does not age well (the banana tends to oxidize as all natural/real foods do).
  5. When the cookies first come out of the oven, they will appear lighter, almost golden brown on the outside (while the interior will be dark and fudgy… swoon).  The exterior will progressively darken over time but the will be equally delicious. If you store uneaten cookies in the fridge, you will observe this transition.
  6. We like to warm our reserved cookies from the fridge before enjoying – this softens the cookie and melts the chocolate all over again.
  7. *Vegan, soy free and sugar free dark chocolate chips are available at health food stores.  You can also make your own chocolate chips.


Directions:

Heat oven to 325 F.
  1. Using a simple hand mixer, food processor or blender, mix together almond butter, banana and vanilla until well combined and smooth.
  2. Add cocoa powder, egg and maple syrup or honey and mix to combine.
  3. Mix in dark chocolate chips by hand with the help of a spatula or wooden spoon.
  4. The mixture should be creamy and somewhat firm/fudgy. If the mixture is too soft, simply place it in the fridge for about 20 minutes or so to allow it to firm up a bit.
  5. Meanwhile, place parchment paper over a baking sheet and gently brush or spray the paper with olive oil.
  6. Drop almond butter cookies onto sheet by rounded tablespoons allowing room between the cookies (they will expand and puff up somewhat).  Add another chip or two to the top of each cookie.
  7. Place cookies in oven and bake for 15-20 minutes (depending on how hot your oven is) or until cookies are firm to the touch.
  8. Remove the cookies from the oven and allow them to cool on a rack for a few minutes  before enjoying!
  9. Store leftover cookies in a covered container in the fridge.
© Inspired Edibles


you should end up with a creamy, almost fudge-like, batter

a light and fluffy golden exterior…

combines with a moist and rich fudgy interior

Filed Under: Snacks and Dessert

Carrot & Sunflower Seed Breakfast Bread

February 27, 2014 By kelly / inspired edibles 19 Comments

Every plant in the universe seems to want to grow in this part of the world and I think I know why.

Of all the wonders California has to offer, surely the greatest has to be the sun.

I miss the snow.  I do.  I miss home, my community and my family.  I dream about our house in Ottawa and the ash tree in our backyard.

But you take your blessings where you find them and there’s just something to be said for stepping out the door on a February afternoon and being surrounded by warmth and light. Having the sun caress every part of your body and watching your dog sparkle in the light. She too comes to life in the sun. Her smile is unmistakable. It transforms me.

So today, I thought I would send you all a little bit of sunshine from the golden state so that you too can take part in the experience.

These photos were taken outside on our little balcony.  To me they represent all that surrounds us here in beautiful California including the gorgeous orange trees that continue to produce fruit (seemingly without end).

As for the recipe, I spotted a lovely orange-hued bread over at my friend Charles’ the other day that immediately caught my attention (as many of his recipes do).

I was smitten with the idea of the puréed carrot in the loaf but somehow couldn’t get the idea of leaving little bits of visible carrot flecks in the loaf out of my head.  I knew it would add weight to the bread and transform it into something different but I wanted to see where things might end up.  So off I went with three different tries, ending up with something a little different each time.  This was a happy experiment, and I have Charles to thank for it.

This is definitely not a soft, light and springy bread.  There is texture, density and complexity to this loaf but that is not to say that it’s not delicious in it’s own right.  We especially enjoyed this robust, colourful bread topped with sharp cheese and toasted with a touch of marmalade (for my husband) and hot red pepper relish (for me). The boys like to have their first piece simply with butter.  Who can blame them.  Next up will be sandwiches.

There are mild sweet notes generated from the orange and the carrot in this bread but they are quite subdued (less than 1.5 grams of sugar per slice).  Each serving delivers as much protein as an egg and also packs a good amount of dietary fibre. The seeds, orange and carrots also ring in a host of vitamins, minerals and antioxidants.

And here’s something else. Did you know that cooking carrots actually boosts their antioxidant content by breaking down cell walls?  Studies have shown that eating cooked carrots results in much higher blood levels of beta-carotene.  Beta-carotene’s antioxidant properties are thought to help reduce our risk of disease. Some of the beta-carotene we consume gets converted to retinol (the active form of vitamin A) which helps support our immune system, vision, cell growth (including skin), teeth and healthy bones.

Be sure to read through the Nutrition and Cooking Notes I prepared for options and best results.

Carrot & Sunflower Seed Breakfast Bread

Carrot & Sunflower Seed Breakfast Bread (inspired by FiveEuroFood )

  • 2 + 1/2 cups (625 mL) flour of choice (I used equal parts light and whole spelt)
  • 1 cup (250 mL) oatmeal (100% pure rolled oats)
  • 1 tsp (5 mL) salt
  • 1 heaping Tbsp (15 mL) Herbes de Provence (any mixture of dried herbs will do)
  • 2 Tbsp (30 mL) sunflower seeds 
  • 2 large carrots (about 1 cup grated)
  • 2 Tbsp (30 mL) orange juice
  • 2 Tbsp (30 mL) orange zest
  • 1 + 1/2 Tbsp (22.5 mL) dry active yeast

Makes 10 Slices

Nutrition & Cooking Notes:

  1. I’m calling this a breakfast bread but of course, any occasion and any hour of day works!
  2. You can experiment with different flours as you like for this loaf.  If you are looking for something light and springy, you may want to start with AP flour in combination with the oats but naturally this will take away from some of the nutrients.  It’s a bit of a balancing act however because using only whole grains in tandem with the weight of the carrots and seeds can create a dense, heavy and somewhat chewy loaf.  You will also not get as much rise from your loaf with the heavier, denser grains but this may or many not be a consideration for you.
  3. Oven temperatures vary widely.  The oven I am using here is the hottest I’ve ever worked with and I placed the bread on the lower rack to prevent it from over-cooking (browning).  If your oven is more moderate, a middle rack placement with slightly more cooking time may be appropriate.  Allowing the bread to sit in the warm (but turned off) oven allows the interior to continue to cook.
  4. Herbes de Provence is simply a mixture of herbs typically found in the Provence region of France. The brand I use (Morton & Bassett) contains: chervil, basil, rosemary, tarragon, garlic, lavender, marjoram, savory, thyme and parsley.
  5. Studies continue to link a shortage of vitamin D to many serious diseases including: cancer, multiple sclerosis, diabetes, heart disease and influenza. Recent research has also shown that vitamin D deficiency is associated with higher levels of inflammation in the body (a precursor to age-related diseases). Our best source of vitamin D comes from the sun. During non-summer months, when the northern latitude sun is not sufficiently strong, adults are advised to take at least 1,000 IUs (international units) of vitamin D per day. Children should also be taking vitamin D. Older adults, people with dark skin, those who don’t spend a lot of time outdoors and those who wear clothing that covers most of their skin, should consider supplementing year round. Vitamin D levels can be easily tested through your medical or naturopathic doctor.

Directions:

Heat oven to 400 F.

  1. Peel and roughly chop carrots placing them into a small pot on the stove. Add just enough water to cover the carrots – about 1 cup. Allow carrots to come to a gentle boil for about 10 minutes until barely soft.
  2. Stain the cooked carrots reserving the warm liquid.
  3. Place carrots in a blender with some of the reserved water and pulse once or twice (depending on power of your blender) just until the carrots have broken down into small pieces but are not yet mush or purée (add more of the reserved water if necessary). 
  4. Transfer the blended carrots into a large dish with surface area (such as a casserole dish) and spread them out to cool.
  5. Meanwhile place flour and oatmeal in a large bowl. Add salt, herbs and sunflower seeds, mixing to combine.  Add yeast and combine once more.
  6. To the cooling carrots add orange juice and orange zest, mixing to combine.
  7. Add cooled carrot-orange mixture to the dry ingredients and mix to combine. Add the remaining reserved water (and additional water) as necessary to bind the dough. (I use my hands to mix at this point). The dough should be sufficiently moist (not too dry) without being wet.
  8. Form dough into a rough ball and place in a bowl.  Cover with a cloth in allow the dough to sit in a warm, dry place for 15 minutes. 
  9. Remove dough and knead 5-7 times on a floured surface. 
  10. Transfer the dough into an loaf pan that has been sprayed with olive oil and shape the dough to accommodate the loaf dimensions (trying to distribute as evenly as possible).
  11. Cover the loaf once more with a cloth and allow it to sit for 30 minutes in a warm, dry place to rise. 
  12. Remove cloth, admire your beautiful loaf and then place in the middle or bottom rack of oven (depending on how hot your oven is) for approximately 20-25 until the loaf begins to take on a golden colour.  Turn oven off and allow the loaf to sit for another 5 minutes in the oven.
  13. Carefully remove loaf from oven and allow it to cool for 10 minutes or longer before slicing.  Enjoy!
© Inspired Edibles


right off the tree (it will never stop amazing me)

Filed Under: Breads Muffins and Loaves, Breakfast, Snacks and Dessert

Raspberry Yogurt Pancakes with Oatmeal and Spelt

February 4, 2014 By kelly / inspired edibles 15 Comments

When our boys were young, pancakes were a breakfast regular.

And not just on weekends.

My husband would get up early in the morning on work days and cook up a batch of pancakes before the boys headed off to school. He would fill the batter with oatmeal and plump apricot and smother the cakes in peanut butter. The boys loved them and it was a great way to motivate them in the morning, get them involved in the cooking process and fill their bellies with some wholesome ingredients that combined quality carbohydrates, vital protein and natural fats. Over time, other ingredients found their way into the batter like ground flax seed, nuts and yogurt.  A whole generation of nut butters also unfolded around this time so we got to experiment with some of our favorites — almond, hazelnut, and pumpkin seed — elevating the sometimes under-nutritious pancake to a whole new level.

The fun part about pancakes is that virtually anything goes.  You can adapt them to suit your dietary needs and preferences and leave out the grains altogether if you prefer. This is easily accomplished by using a base of ground nuts, seeds, drupes and/or legumes instead.  Many of these ingredients come in their own flours (coconut flour, almond flour, chickpea flour, for example) and are available at health food stores but you can also grind your own nuts/seeds.

Here is a version that I made from a combination of almond, chia and flaxseed: Grain Free Lemon Rosemary Pancakes

The pancakes I’m featuring today are made from a base of spelt and oatmeal with some delicious yogurt mixed in. Despite the pancakes’ protein and fibre rich base, they have a pleasingly light, springy and creamy texture. The sprinkle of coconut is especially yummy over the finished cakes with the raspberry and yogurt.

Although pancakes are not that common at this stage in our home, the boys were more than just a little excited to find these cakes waiting for them when they got back from school the other day. They popped them in the toaster and smothered them with almond butter! Great snack.

Be sure to read the Nutrition and Cooking Notes for options and best results.

Raspberry Yogurt Pancakes with Oatmeal and Spelt

Raspberry Yogurt Pancakes with Oatmeal and Spelt

  • 1 + 1/4 cups (312.5 mL) spelt flour (or flour of choice*)
  • 3/4 cup (187.5 mL) oatmeal (100% pure rolled oats)
  • 2 tsp (10 mL) baking powder
  • 1 tsp (5 mL) baking soda
  • 1/2 cup (125 mL) fresh raspberries – crumpled + more for topping
  • 3/4 – 1 cup (250 mL) buttermilk or until proper consistency is achieved
  • Generous 1/2 cup (125 mL) plain Greek yogurt
  • 2 tbsp (30 mL) coconut oil, melted
  • 2 eggs, gently whisked
  • 1 Tbsp (15 mL) orange zest
  • 2 tsp (10 mL) vanilla
  • 2 Tbsp (30 mL) coconut flakes for topping, optional
Serves 4

Nutrition & Cooking Notes:

  1. *You can use any flour of choice here including gluten free grains.
  2. If you have not yet experimented with spelt flour in baking/cooking, I encourage you to provided you are not gluten intolerant.  Although spelt contains gluten it has a soft and silky quality to it that many find easier to breakdown and digest than wheat.  These same delicate properties give rise to a smooth and silky texture in baked breads, muffins and cakes such as these.
  3. If fresh raspberries are on the expensive side or are looking a little jaundiced this time of year, you can certainly use frozen berries but just bear in mind that this may affect the liquid content of the recipes as berries release water as they thaw.

  Directions:

  1. In a large sized bowl, combine: spelt flour (or flour of choice), oatmeal, baking powder and baking soda mixing well to integrate.
  2. Gently add the raspberries to the dry mixture tearing them into smaller pieces with your fingers as you drop them into the mixture (a bit like crumpling cheese) — it will give the berries more coverage in the batter.  Stir the dry batter and berries together gently taking care not to mash the fruit.
  3. In a separate medium sized bowl, whisk together: eggs, buttermilk, coconut oil, vanilla, Greek yogurt and orange zest.
  4. Meanwhile, warm a skillet (cast iron works especially well) on the stove over low-medium heat adding a dollop of coconut oil, butter or olive oil to the pan and spreading to cover the base of the skillet.
  5. Add wet ingredients to dry, mixing only until combined.  Allow the mixture to sit for a moment. If the batter is too thick, simply add more buttermilk or water.
  6. Drop the batter by quarter cup fulls (or so) onto the hot skillet allowing the cakes to bubble around edges before flipping over and cooking the other side.
  7. Plate the cooked pancakes and top with a sprinkle of coconut (if desired) and some additional yogurt and fresh berries.
© Inspired Edibles


Filed Under: Breads Muffins and Loaves, Breakfast, Snacks and Dessert

Flourless Black Bean Chocolate Chili Muffins

January 22, 2014 By kelly / inspired edibles 22 Comments

Are you clenched?

I was reading the most fascinating article in the car last night while I was waiting for my son to finish up practice.  It was written by a cancer survivor who described her success in relaxing her body and mind through the simple exercise of ‘unclenching’ her face.

One of the first areas of the body we tighten unwittingly under stress is our jaw and this form of compression has a ripple effect throughout the body often giving rise to blockages and pain.

So right in front of her oncologist and chemotherapy nurses, this patient would engage in a deliberate act of unclenching her jaw before each treatment, a technique she learned in her yoga practice.  She describes it simply as “dropping the lower jaw away from the upper jaw and letting it hang with an open mouth” (she parallels the look to those “heavy metal mouth-breathing dudes from high school” which I not only found hilarious but also a helpful visual).

But it’s what she describes next that I found most interesting.

The act of relaxing her face not only had a marked effect on her body (there was a measurable decrease in her heart rate each time) it also softened her grasping mind and helped calm her fears and anxieties around her illness.  She describes an openness of the psyche that improved the energy in the treatment room and lead to an emotional unclenching that was integral to her success during each and every treatment.  It allowed her to better deal with what was on hand and even reflect more calmly on things to come.

Belly breathing, visualization, meditation, music and movement are all common ways of eliciting a relaxation response in the body in preparation for the more difficult work of calming the mind. Trying different techniques can help identify the ones that are best suited to our sensibilities.

I share this one as a possible new experience which the author describes as one of the simplest and profoundly effective techniques we can practice.

~~~~~~~~~~~~~

Well I haven’t been this excited about the outcome of a baking experiment since I made these Flourless Peanut Butter and Banana Chocolate Chip Cookies.


These muffins are soft, moist and surprisingly sprightly despite their lack of flour (love that). They have a nice rise, delightful taste and are also powerfully nutritious.  The banana and nut butter flavours are muted amidst the more dominant chocolate chili taste.  For good or for bad, the black beans are imperceptible in taste (in my view anyway).  They add colour, bulk, density and character to the mix — as well as a host of nutrients.

Be sure to check out the Nutrition and Cooking Notes for more information and best results!

Flourless Black Bean Chocolate-Chili Muffins

Flourless Black Bean Chocolate-Chili Muffins (Gluten Free, Dairy Free)

  • 1 generous cup (250 mL) of happy and healthy cooked black beans (thoroughly rinsed if using canned)
  • 1/2 cup (125 mL) all natural almond butter
  • 1 large ripe banana
  • 1/2 cup (125 mL) quality cocoa powder 
  • 1 tsp (5 mL) chili powder of choice (see notes)
  • 1 tsp (5 mL) baking powder
  • 2 tsp (10 mL) vanilla extract
  • 1/4 cup (62.5 mL) honey
  • 1 egg, gently beaten
  • hot chili flakes, optional
 

Makes 24 mini muffins

Nutrition & Cooking Notes:

  1. Nutrition Content: A snack sized portion of these mini muffins (3 muffins) provides close to 12 grams of protein (equivalent to 2 eggs), 7 grams of fiber as well as 20% daily iron requirement (other notable nutrients: calcium, potassium, folate, magnesium, phosphorous, vitamin E and monounsaturated fats).  That’s a lot of goodness stored in 250 calories.
  2. The Chili Factor – There are many different kinds of chile/chili you can consider for this recipe and it really just depends on the type of flavour impact you are looking for.  Ground chile peppers such as cayenne and habanero are amongst the hottest varieties so you will want to use these chile powders carefully and sparingly (particularly initially) – I use small pinches (1/8 or 1/4 tsp) of these powders on occasion in cooking.  Ancho chile is beautifully complex and warm (but not as hot as cayenne/habanero).  Paprika and chipotle (smoke-dried jalapeno) are other favourites.  The more generic ‘chili powder’ that you find in the supermarket is really a mixture of milder chile peppers with the addition of herbs/spices such as onion/garlic powder and salt. Chili powder of this kind would be suitable for this recipe but you could also add a pinch of ancho or chipotle in addition to it just to give it a bit more robustness.  It’s really just a matter of personal taste.  My friend MJ has put together some great information on types of chile powders which you may find very useful. I am constantly referring to it — thank you MJ!
  3. The Sugar Content – I find the sweetness of these bites strikes just the right note for my taste but if you are accustomed to more sugar, you can start with 1/3 cup of honey and work your way down.  Another thought is to keep 1/4 honey and add a dollop of ganache to the tops of the muffins — adding just a drop of sweetness to the top of food (rather than the whole way through) goes a long way to contributing to taste without overwhelming with sugar. I used a simple combination of dark chocolate and cream (sub coconut milk for dairy free) in the picture below (2 ounces coconut milk or 10% cream, 2.5 ounces 75% dark chocolate pieces) but you could also add a tablespoon of honey or pure maple syrup to this combination. Because the muffins are so small, you will literally only need a teaspoon of ganache to make a taste impression.

Directions:


Heat oven to 325 F.

  1. In a food processor, blender (or with a hand mixer ♥), blend: black beans, almond butter and banana until the beans are well broken down and combined with the other ingredients.
  2. In a separate small bowl, combine: cocoa, chili powder and baking powder.  Add the dry ingredients to the wet mixture and blend/pulse a few times before adding: vanilla, honey and egg, blending once again until well combined. The batter will be relatively fluid.
  3. Pour the batter by tablespoon full into silicone lined (or gently greased) miniature muffin cups filling until just before the limit.
  4. Sprinkle the tops of the muffins with a few hot chili flakes if desired (I sprinkled a few on the cooked muffins for fun).
  5. Place muffin tray in the oven and bake for approximately 20 minutes or until muffins have risen and firmed somewhat (the tops will also crack – a bit like banana bread – but they are beautiful this way). 
  6. Allow muffins to cool for 10 minutes before removing from tray and enjoying. (If you remove them too quickly, they will fall apart).
  7. These muffins store beautifully in a covered container in the fridge.  We did not have leftovers to try the experiment, but I suspect that they would freeze equally well.
 
© Inspired Edibles


no visible beans in here


Filed Under: Breads Muffins and Loaves, Breakfast, Snacks and Dessert

Spicy Buffalo Cauliflower “Wings” with Homemade Ranch Dressing

January 15, 2014 By kelly / inspired edibles 14 Comments

It turns out it helps to know a little something about football when you’re living in the US.

Take our most recent trip to LA.  We crossed paths with all kinds of friendly people who asked us where we were from. My answer is still the generic “Canada” (I gave up on Ottawa some time ago since most Californians have never heard of the place).

My husband, possibly preferring to keep it simple, tells people we are from San Francisco.  Not so simple.

Everyone (and I do mean virtually everyone) from the coffee shop baristas, to the families standing in line with us at Universal studios, to the bikers on ventura highway, had the same thing on their minds: FOOTBALL.  Now normally this wouldn’t be a problem — we love sports and welcome chewing the fat about it.  There’s just one little hiccup in this case: we know precisely nothing (zero, zilch, nada) about football — including the small fact that our newly declared “home team” was about to play a critical wild card game that would decide their seasonal fate.  So we smiled. A lot. And then we smiled again.

And when we were all done smiling, I got down to business.

I hit up a few strangers at the Safeway and got the lowdown on the 49ers chances; I interviewed unsuspecting parking lot attendants and talked strategy with bank tellers and dog walkers. I got everybody’s story. I sent emails to football loving friends and yes, even watched the wild card game.

Fast forward two weekends and the 49ers are still in it.  We’re heading out to a local pub to catch all the action this Sunday.  Our first public football viewing experience. I feel so integrated.

To help celebrate the fun, I’m sharing a healthier twist on a pub classic that I’ve been wanting to make for over a year!! These spicy buffalo cauli bites are sure to be a hit whether your catching your favorite sports team in action or cuddling up with a good book or movie this weekend.

We hope you enjoy them as much as we do. (And Go Sens Go).

Spicy Buffalo Cauliflower “Wings” with Homemade Ranch Dressing

Spicy Buffalo Cauliflower Wings with Homemade Ranch Dressing

For the Buffalo Cauliflower “Wings”

  • 1 large head of cauliflower, coarsely chopped into florets (creates about 4 cups)
  • 1/2 cup (125 mL) almond milk (or milk base of choice)
  • 1/2 cup (125 mL) water
  • 3/4 cup (187.5 mL) flour of choice
  • 1/2 tsp (2.5 mL) onion powder
  • 1/2 tsp (2.5 mL) garlic powder
  • 1/2 cup (125 mL) of your favorite buffalo hot sauce* 
  • 2 Tbsp (30 mL) melted coconut oil or butter
 
For the Ranch Dressing
  • 4 Tbsp (60 mL) well-shaken buttermilk
  • 2 Tbsp (30 mL) plain Greek yogurt
  • 1 tsp (5 ml) rice vinegar or fresh lemon juice
  • 1/2 tsp (2.5 mL) garlic powder
  • 1/2 tsp (2.5 mL) honey
  • Sea salt and coarse pepper to taste
  • finely chopped fresh dill or chives

Serves 2-4

Nutrition & Cooking Notes:

  1. *If you’re like me and have never been a big fan of the taste of Frank’s buffalo hot sauce (I know sacrilege; who doesn’t like Frank’s, right?) you can make your own buffalo sauce by following this link (a delightful whole foods recipe – thank you Domestic Fits).  I also like Bella’s all natural brand of hot wing sauce available at Whole Foods.
  2. The convention is to serve buffalo wings with celery and blue cheese which is certainly an option. We decided to go with cucumber here and lighten things up on the dressing side with some homespun ranch.
  3. The batter really enhances the taste of these little buffalo bites.  When I first saw the recipe circulating around the blogosphere, I thought it was just cauli florets dunked in buffalo sauce (still intriguing) but the batter has the effect of ‘beefing’ up the taste of the cauliflower such that it creates a more substantive bite not dissimilar to a wing in that respect (maybe even heartier according to my son who was pleasantly surprised by the texture).
  4. Though the taste and texture of these bites are very pleasing, I can’t really say that they ‘crisp up’ in the conventional sense like a chicken wing.  But still delightful in their own right.
  5. These bites are best enjoyed warm right from the oven!

Directions:

Heat oven to 425 F.

  1. Prepare ranch dressing by whisking ingredients together in a medium sized bowl and set aside.
  2. In a separate medium sized bowl, whisk together milk, water, flour, onion and garlic. 
  3. Dip each floret in the batter consecutively, allowing the excess to drip off before placing the pieces on a large parchment-covered baking sheet.
  4. Bake battered florets for about 25 minutes until the batter has ‘gelled’ somewhat and the florets are fragrant.
  5. In the meantime, whisk buffalo hot sauce with melted coconut oil or butter in a small bowl. 
  6. Once the battered cauliflower florets have baked, carefully brush the florets with the sauce, making sure they are entirely coated. 
  7. Place sauce covered florets on a fresh piece of parchment paper and back into the oven for 8-10 minutes, until the florets are just beginning to brown.
  8. Remove from oven, allow your ‘wings’ to cool slightly before serving with ranch dressing.
© Inspired Edibles
 

Filed Under: Appetizers and Starters, Snacks and Dessert

Chocolate dipped Apple Wedges with Cinnamon toasted Oatmeal and Pecan

December 30, 2013 By kelly / inspired edibles 12 Comments

6a72cef5779b6d64d964a161126d7fa7[1]

I hope you are all enjoying a peaceful and fulfilling holiday season in whatever fashion suits you best.

If you are anything like us, I suspect that you have been amply fed this past month (or so) and may be looking to shift gears from the heavier hitting sweets and treats to something a little lighter.

I find dark chocolate (75% cocoa or more) especially effective at satisfying sugar cravings while not feeding the bottomless pit of desire fueled by milk chocolate (the kind of sugar that hijacks our brains’ neural circuits and keeps us locked in to old habits). If you’re looking for an exit strategy to slowly come down from the sugar high and the treadmill of addiction that surrounds it, this dessert idea offers a kind and gentle descent.

Fun and festive, these little apple wedges are not only full of flavor and satisfying texture, they also pack some wonderful antioxidants and nutrients.  Light, crunchy and super tasty, they make a perfect addition to any new year’s table (and are rather pretty too, don’t you think?).  They are also a great project for small hands and completely adaptable to taste preferences.

Be sure to read the Nutrition and Cooking Notes for options, explanations and ideas.

I hope you have fun with these, any time of year!

Chocolate dipped Apple Wedges with Cinnamon toasted Oatmeal and Pecan

Chocolate dipped Apple Wedges with Cinnamon toasted Oatmeal and Pecan
  • 4 apples of choice, or any fruit as desired
  • 1/2 tsp cinnamon, or any combination of spices as desired
  • 4 Tbsp oatmeal (100% pure rolled oats), or other flaked grain/cereal as desired
  • 4 Tbsp chopped pecans, or other nut/seed as desired
  • 4 ounces (115 grams) dark chocolate (75% cocoa or more)
Makes 32 Apple Wedges

Nutrition & Cooking Notes:

  1. Antioxidants – dark chocolate is rich in flavonoids, a phytochemical with antioxidant, anti-inflammatory and anti-clotting properties.  Research suggests that flavonoids may help protect our hearts by lowering blood pressure and reducing LDL cholesterol levels.
  2. Cocoa Content – the higher the percentage of cocoa you use, the less sugar it will contain.  Fruit helps deliver natural sweetness to this dessert but you can further enhance the flavor by adding spices and natural essence to the chocolate as described below.
  3. Fruit & Toppings – you can use up any fruit you happen to have on hand for this casual spin on fondue — some of our favorites include: clementine, banana, apple, pear, grapes and berries.  You can also play around with the toppings/sprinkles including nuts/seeds, puffed or flaked cereal grains such as: oatmeal, rice, quinoa, buckwheat, kamut, barley, etc.
  4. Natural Flavor Enhancers — Fruit delivers significant natural sweetness but you can further enhance flavor without adding sugar by using spices and natural essences.  The cinnamon really comes through nicely with the apple here but you can play around with whatever seasonings work best for you – anise, clove, nutmeg, cardamom, ginger, citrus zest, etc.  You can also vary the base of the chocolate by adding natural essence of peppermint or vanilla to create new and fresh taste sensations.
  5. Nut/Seed and Non-Nut Butters — If chocolate is not your thing, consider dredging the fruit pieces through nut, seed or non-nut butters such as pea or soy.  This is another great way to amplify taste and nutrition while delivering a great snack option as well.
6a72cef5779b6d64d964a161126d7fa7[1]

Directions:

  1. It is best to cut/chop the fruit that oxidizes (browns) quickly right before serving — such as banana, apples and pear.  While the chocolate is melting, you can use citrus to delay the onset of oxidization (described below) prior to serving.
  2. Wash and chop apples into 8 wedges each. While the chocolate is melting, I recommend soaking the apple wedges in a bowl of lemon water (simply squeeze some fresh lemon juice into a couple cups of water) and store in the fridge. Lemon delays oxidization (the inevitable browning that occurs once you cut an apple).
  3. In a small dry skillet set to low-medium heat, toast oatmeal for a couple minutes until it begins to heat. Add cinnamon (and/or other spices as desired) and stir to combine until fragrant.  Remove from heat and set aside.
  4. Meanwhile, place chocolate in a small sturdy pot on the stove over lowest heat taking care to avoid all contact with water.  Allow chocolate to melt watching carefully, and stirring to assist.
  5. Once chocolate has melted, remove from heat and add natural essence of peppermint or vanilla, if using.
  6. Remove apple wedges from lemon water and pat them dry.
  7. While the chocolate is still warm, carefully dip the dry apple wedges (or other fruit) one at a time into the chocolate, coating a portion of them in melted chocolate.
  8. Place the chocolate dipped apple wedges on a plate or tray and while the chocolate is still wet, sprinkle with chopped pecans, cinnamon toasted oatmeal or other toppings of choice.
  9. Enjoy!
© Inspired Edibles


6a72cef5779b6d64d964a161126d7fa7[1]

Filed Under: Snacks and Dessert

  • « Previous Page
  • 1
  • …
  • 4
  • 5
  • 6
  • 7
  • 8
  • …
  • 13
  • Next Page »

Search

Subscribe to Inspired Edibles via Email

Say Hello!

  • Facebook
  • LinkedIn
  • Pinterest
  • Twitter
Visit Kelly Mulcair / Inspired Edibles's profile on Pinterest.

Recent Posts

  • New Moon Intentions

    New Moon Intentions

    April 26, 2025
  • Sleep Solutions for Sensitive Souls (Full Moon Edition!)

    Sleep Solutions for Sensitive Souls (Full Moon Edition!)

    April 10, 2025
  • Elderflower Mocktail

    Elderflower Mocktail

    March 13, 2025
  • Winter Citrus Salad with Shaved Fennel & Castelvetrano Olives

    Winter Citrus Salad with Shaved Fennel & Castelvetrano Olives

    January 25, 2025
  • Winter Flourish Bowl

    Winter Flourish Bowl

    January 4, 2025

Copyright © 2025 Inspired Edibles, All Rights Reserved