Inspired Edibles

~ wellness, wonder, words ~

  • Home
  • Welcome ❥
  • Inspire
  • life
  • Index
  • Contact
  • Privacy Policy

Flourless Peanut Butter and Banana Chocolate Chip Cookies (Gluten Free, Dairy Free)

June 10, 2013 By kelly / inspired edibles 60 Comments

These cookies are probably the most unusual love bites I’ve ever made.

Unusual, in part, because they are not only grain free but also flour free – no dehydrated chickpeas or coconuts here! But what amazes me most is that despite their lack of flour, baking soda/powder, butter and refined sugars, they turn out as though they were… yes, almost a customary cookie, with such a yummy flavor!

…

Read More »

Filed Under: Snacks and Dessert

Blueberry Bliss Breakfast Bars (No-Bake, Vegan, Gluten Free, Naturally Sweetened)

May 15, 2013 By kelly / inspired edibles 114 Comments

Even under the least desirable conditions (rain, snow, sleet, ice, and let’s not forget those – 40 C wind chill temperatures), I always come back to thinking that walking my dog first thing in the morning is pretty much the best possible way to start the day.

An ideal opportunity to welcome the new and rinse out the old before the chaos of the inevitable takes over and the monkey mind sets in.

And this time of year, well, it’s hard not to be in love with the outdoors. Everything is lush, fresh and inviting. Flashes of life and color on every corner.

Even our cat is getting in on the action!  Our frolicking feline will actually walk to the park with us (au naturel) and hang out while we throw balls with our dog. Then, unprompted, he makes the pilgrimage home, several blocks, turns and obstacles away. Since most cats have a brain the size of an edamame bean anatomically, I find it remarkable.  The sense of direction, desire to socialize, ability to navigate; mysterious and kinda miraculous, too; cats are utterly cool creatures.

Here’s to your morning glory!

…

Read More »

Filed Under: Breads Muffins and Loaves, Breakfast, Snacks and Dessert

7 Delicious Brunch Ideas for Mother’s Day!

May 7, 2013 By kelly / inspired edibles 37 Comments

All things seem possible in May
                                                        ~ Edwin Way Teale
~~~~~~

Today I am honoring the season of growth, renewal and new life by paying tribute to mothers around the world.  Those who are still with us and those we carry in our hearts.

Mother’s Day is this coming Sunday, May 12th and I can’t think of a better way to celebrate than by gathering over lovingly prepared food.

And I’m in good company too.

Some of my favorite healthy food bloggers are here with me today sharing their gorgeous work as we tip our hats to moms of all ages and stages of life.

So sit back, relax and enjoy the scenery.

~~~~~

Here’s to you and your radiant health!

A young mother and femivore, Sandra’s food and garden photography
together with her exquisite attention to detail will literally take your breath away

(be sure to apply your oxygen mask securely before visiting her site!)

Sunflower Sunset Juice by Kitchen Apparel

Recipe Here

Five minutes is all you will need on Kiersten’s site to be reminded
of just how delicious and inventive vegetarian food can be.

No faux meats here folks, just the real deal.

Apricot Crostini by Oh My Veggies Recipe Here

 
Sonia is a talented recipe developers who inspires with her unique & delicious recipes.
She also happens to be a downright lovely person!

Grain Free Granola and Fruit Salad by The Healthy Foodie
Recipe Here

Supporting those with special dietary needs and illnesses, Jeanette’s focus is on
health building without sacrificing flavor. She provides a full assortment

of recipes including a special segment devoted to kids cooking!

Strawberry Banana French Toast Casserole by Jeanette’s Healthy Living

Recipe Here

One of my oldest and dearest blogging buddies, France’s no-nonsense
approach to whole foods cooking is the perfect match for our busy lifestyles.
This dynamic duo illustrates time and time again how easy it is

to create delightful, full-flavored meals in a snap!

Mango Quinoa Salad with Lime Ginger Vinaigrette by Beyond the Peel

Recipe Here

Blogging from the west coast of Canada, certified raw foods chef Koko Brill
lights it up with her contagious smile and gorgeous health-conscious recipes.

(psst! she has a particular knack for baking and pastry arts)

Raw Caramel Chocolate Pie by Koko’s Kitchen

Recipe Here

~~~~~

Did I tell you I was in great company, or what?

Baked Egg & Veggie Bites (Grain Free, Gluten Free)

  • 6 eggs
  • 1/3 cup milk
  • 1/4 cup plain Greek yogurt
  • 1/2 cup shredded cheddar cheese
  • 1 + 1/2 cups fresh chopped vegetables of choice (I tossed in zucchini, orange bell pepper, onion, Swiss chard and cherry tomatoes)
  • Sea salt and pepper to taste
———
Serving:


Makes 6-8 regular sized muffin bakes (or 20-24 mini muffin bakes).

Instructions:Preheat oven to 350 F.

In a medium size bowl, combine eggs, milk and yogurt, whisking to combine.  Add cheese and veggies and mix to combine.

Pour egg and vegetable mixture, about 3/4 full, into paper lined muffin cups that have been lightly sprayed with Canola/Olive oil.  Silicone cups also work very well here if you happen to have them.

Bake mini muffins for approximately 12-15 minutes or until puffed and just firm to the touch.  Regular sized muffin cups will take approximately 15-20 minutes.


We are all born of mothers ~

Filed Under: Appetizers and Starters, Breads Muffins and Loaves, Breakfast, Salad, Snacks and Dessert

Quinoa Cornbread Muffins with Black Beans, Arugula and Parmesan (Gluten Free)

May 1, 2013 By kelly / inspired edibles 21 Comments

I love a good cornbread straight from the oven with generous chunks of spicy jalapeno and a warm pat of melting butter (I mean, who doesn’t right?) but lately I’ve had visions of plump, juicy black beans tossed into the mix.

I’ve been imagining these perky fibre-rich fellows dotting the muffin tops for months now – some dipping below the surface some dancing on top – and finally had an opportunity to act out my fantasy ;0).

And since I was busy transforming, I decided to amp things up further by pairing the lovely coarse texture of cornmeal with another full-bodied big boy in the form of the nutty quinoa seed.

I tell you it was like discovering a couple of long lost family members.

Where have you been all my life?

So happy with the result. These muffins not only taste delish they are also packed full of nutrients to the point of being a mini-meal.  Perfect on their own as a hearty snack (great grab-n-go) or for dunking in soups, stews and chilis.

Unlike many other bready things that will send insulin levels surging, enhance sugar cravings and efficiently store body fat (three for the price of one!), these little puppies pack over 10 grams of protein and 4.9 grams of fibre in every serving keeping them low on the glycemic index, which in turn helps keep our blood sugar levels stable, our tummies satisfied and our moods humming along happily.

A beautiful thing!


Quinoa Cornbread with Black Beans, Arugula and Parmesan (Gluten Free)

  • 1 + 1/2 cups cooked quinoa
  • 1 + 1/4 cups whole grain cornmeal (I used medium grind)
  • 1 cup cooked black beans, thoroughly rinsed if using canned
  • 1.5 ounces (40 grams) grated Parmesan cheese
  • 2 Tbsp coconut palm sugar or sugar of choice
  • 1 Tbsp finely minced fresh arugula + more for topping
  • 1/2 tsp sea salt
  • 2 tsp baking powder
  • 2 tsp baking soda
  • 1 cup milk or milk beverage substitute of choice
  • 2 eggs
  • 2 jalapeno peppers, seeded and minced (or to taste)
  • 4 Tbsp olive oil

~~~~

Serving: Makes 12 regular sized muffins

Notes:

Quinoa increases about 4 times in volume when cooked. A 1/2 cup of dry quinoa should generate about 2 cups of cooked quinoa. I used 1 cup of dry when preparing this recipe to create leftovers for quinoa salad.  Simply pop leftovers in a sealed container in the fridge until you are ready to use it.

If heat is not your thing, simply skip the jalapeno pepper and add another tablespoon of minced arugula if you wish.  I like using fresh jalapeno peppers but you could equally use bottled and sliced jalapeno peppers here.

Directions:

Heat oven to 375 F

Cook quinoa according to package directions (generally 1:2 ratio quinoa to water) and allow the cooked quinoa to cool.

In a large bowl combine cooked and cooled quinoa, cornmeal, Parmesan cheese, sugar, salt, baking powder, baking soda and arugula stirring to combine.  Add 3/4 cup black beans (reserving the other 1/4 cup for topping) and stir gently to combine taking care not to mash the beans.

In a separate bowl lightly beat eggs and whisk in milk, jalapeno peppers and olive oil.

Add wet ingredients to dry mixing only until combined.

Divide batter among 12 gently oiled muffin cups (I like to use silicone liners).  Top each muffin with a few more black beans and some additional pieces of torn arugula.


Place quinoa cornmeal muffins in oven and bake for 18-20 or until firm to the touch and golden brown.
Allow muffins to cool (slightly ;o) before unmoulding – enjoy!


Filed Under: Breads Muffins and Loaves, Breakfast, Snacks and Dessert

All Natural Apple and Almond Butter Fudge (Vegan, No Bake, Gluten Free)

April 23, 2013 By kelly / inspired edibles 28 Comments

all natural apple fudge_inspired edibles
I’ve been having so much fun experimenting with this homespun version of fudge.

Now, I should probably get this out of the way right off the top.  This is not your grandma’s fudge (nor likely your aunt’s, uncle’s or sister-in-law’s). If you’re anticipating a traditional fudge recipe with accompanying taste, you will be disappointed.

On the other hand, if you’re open to a very low sugar alternative that is sourced from whole foods and also happens to have a beautiful, subtle taste and a melt-in-your-mouth texture, you will be delighted!

I was pleasantly surprised to discover just how well apple and almond butter work together.  Amazingly, both flavors come through distinctly in the fudge without one taking away from the other.  The apple sauce creates the most exquisite and delicate fresh flavor owing to the no-bake properties and the almond butter keeps it grounded.

I like using coconut oil not only for its taste and texture but for its health properties.  Although coconut oil is largely comprised of saturated fat, this plant based saturated fat is made up of a unique blend of medium-chain fatty acids (most fats in our diet are long-chain fatty acids) which appear to have a positive effect on cholesterol levels, notably raising HDL (good) cholesterol.  These same medium-chain fats also appear to increase calorie burning in the body through their action of direct delivery to the liver for energy.

All Natural Apple and Almond Butter Fudge (Vegan, No Bake, Gluten Free)
  • 1/2 cup coconut oil, melted
  • 1/2 cup unsweetened apple sauce
  • 1/2 cup almond butter
  • 1/3 cup pecans
  • 2 Tbsp pure maple syrup
~~~~
Makes 24 – 30 fudge squares

Directions:

Place melted coconut oil, apple sauce, almond butter and maple syrup in a blender or food processor and process until smooth.  Add pecans and process again leaving small chunks or processing until smooth as preferred.

 
At this point, you can taste the batter and determine whether it is sufficiently sweet for your taste.  I find the amount of maple syrup perfect but you can add a touch more or use honey, etc. as you wish.
Meanwhile, line a loaf pan with parchment or wax paper such that it hangs over the edges.  Poor fudge batter into the loaf pan.

 
Place loaf pan in the freezer for 30 to 45 minutes or until the fudge has solidified into a slab without over-hardening (you should still be able to run a knife through the fudge relatively easily).
Remove fudge slab from pan by pulling up on paper and then gently peel back the paper before slicing.
Slice the slab vertically into bars – you should be able to get at least 8 clean bars.

Slice each of the bars into three squares to produce 24 to 30 fudge squares (about 1″ x 1″ each).

I like to store the fudge in a sealed container in the freezer (mostly to hide them from the rest of the family ;o) and then bring them out as desired – they only take about 5-8 minutes at room temperature to soften up. You could also store these squares in a container in the fridge.  But you don’t want to leave them out at room temperature for a long period of time.

I hope you enjoy them as much as we do!  They are truly delightful.


Filed Under: Snacks and Dessert

Cranberry Coconut Quinoa Loaves (Gluten Free, Dairy Free)

April 5, 2013 By kelly / inspired edibles 11 Comments

Some of you may have caught a glimpse of these little loaves on my Facebook page prior to Easter.
My sister, whom I hadn’t seen in nearly 3 years (where does time go?), and her lovely daughter were visiting over the Easter long weekend and preparations were well underway.  
We had a splendid visit!  There was not a lot of sleep involved – always a sign of fun and fast times – but there were plenty of giggles, some heavy duty philosophical conversations during dog walks (isn’t it always the way?), and even a fierce game of charades.  We don’t fool around.
But the highlight for us was a little tea we hosted in honor of our special guests. Now ‘little’ is a relative term when you come from a family of 12.  Things are rarely small, quiet or little for that matter but that’s precisely what makes them so darn fun and memorable. There was laughter ringing from every corner of the house as we sipped our tea, enjoyed some baked yummies and my sister took dramatic charge of the microphone in an impressive and paralleled Rockstar vocal performance that was only outdone by the little hands accompanying her on the drums and guitar.  You rocked it silly sister!!
Cranberry Coconut Quinoa Mini Loaves (Gluten Free, Dairy Free)
  • 1 + 1/4 cup quinoa flour
  • 1 cup whole grain oatmeal 
  • 1 tsp baking soda
  • 1 tsp baking powder
  • 1/2 tsp cinnamon powder
  • 3/4 cup dried cranberry + more for topping
  • 1 cup chopped walnuts
  • 1/3 cup desiccated coconut shavings + more for topping 
  • 1/3 cup coconut palm sugar, substitute other coarse grain sugar
  • 2 eggs, whisked
  • 1 tsp natural vanilla essence
  • 1 cup unsweetened apple sauce or 2 + 1/2 ripe mashed bananas
  • 1/4 cup melted coconut oil or olive oil
  • 1/3 cup dilute orange juice
~~~~~
Notes:

If you are concerned about gluten contamination in your oatmeal (opinions vary widely here), you can easily substitute a gluten free flour in place of the oatmeal. 


Directions:
Preheat oven to 375 F.
Makes 4 mini loaves (or one large loaf or 15 or so muffins if preferred).
In a large bowl, combine dry ingredients (first 9 ingredients).  In a separate smaller bowl, combine eggs, vanilla, apple sauce or banana, coconut or olive oil and orange juice, mixing well to combine.
Add wet ingredients to dry and mix only until combined.
Place batter into 4 gently greased mini loaves or 1 large loaf pan or muffin cups as desired.
Top with some coconut shavings and cranberries.
Bake mini loaves for approximately 25 minutes or until loaves are browned and cake tester inserted in center comes out clean.
Allow loaves to cool before slicing.
If baking a large loaf, the approximate cooking time would be in the 35 minute range.
For muffins, I generally heat to 400 F for 20 minutes.
Enjoy and Cheers to family!

Filed Under: Breads Muffins and Loaves, Snacks and Dessert

Cranberry Chia Energy Bars (Raw, Vegan, Gluten Free)

March 8, 2013 By kelly / inspired edibles 17 Comments

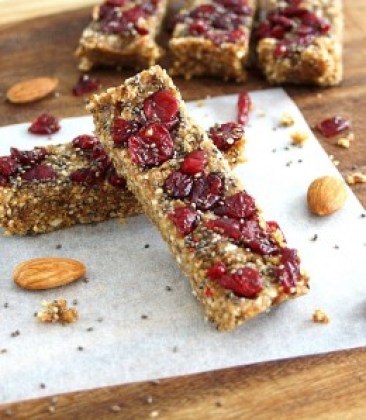
We just can’t seem to get enough of these delicious, nutrient dense energy bars!

They have taken over as the ‘granola’ bar of choice in this home and every couple weeks I try and come up with a new set of ingredients to keep things interesting.

Not only are these energy bars a snap to make – 10 minutes is all you will need to assemble these no-bake beauties – but they are also filled with health building nuts, seeds, fibre, protein and natural fats.  They make a perfect snack or grab n’ go breakfast.

A concentrated energy source with a low glycemic index, these bars will help you feel fuller longer and assist in preventing major jags in insulin/energy levels.

The best part though?

They are just so darn *delicious*

I made this cranberry chia version last Sunday for the boys’ school lunches and, well, err… there were non left by Monday to put in their lunches! (happily, it didn’t take long to assemble more…).

You have to try them for yourselves to see!

 
Cranberry Chia Energy Bars (Raw, Vegan, Gluten Free)
  • 1 heaping cup raw almonds or any other nut of choice
  • 1/2 heaping cup dried, pitted dates that have been soaked in boiling water for 2 minutes to soften (substitute dried cherries, figs or prunes for dates)
  • 1/3 cup just nuts walnut butter or nut butter of choice
  • 3 heaping Tbsp chia seeds
  • 1 tsp pure vanilla extract
  • 1 Tbsp honey or pure maple syrup
  • 1/4 cup dried cranberry
~~~~~~~
Spotlight:

Chia – chia seeds offer plant-based omega-3 fatty acids, fibre, antioxidants and an impressive array of minerals. Unlike flaxseed, chia does not have to be ground to be bioavailable (ie: to be absorbed and usable by the body). Flaxseed has a similar nutrition profile to chia (with slightly less nutrients – fibre, omega-3s, minerals – per serving) but flaxseed has the added benefit of containing lignans – plant compounds believed to be protective of breast health – which chia does not.  Chia is more expensive than flaxseed but due to the highly concentrated nature of its nutrients on a gram per gram basis, a small amount of chia goes a long way.


Notes:

You can easily double the quantity of this recipe and play around with different ingredient choices as desired.

Be sure to read through the directions for best results.

 
Directions:

 Makes about 8 bars or 16 squares
 
 Place almonds in blender or food processor and blend for about 30 seconds or until nuts are fairly well ground.  Add drained dates, walnut butter, 2 Tbsp chia seeds, vanilla and honey/maple syrup blending until the entire mixture is well combined.


The most important part of the recipe: you want to make sure that the mixture is sticky – if it is too dry, your bars will crumble to pieces and you won’t be happy.  Add a touch more nut butter to achieve sticky consistency.  The sticky factor will also help adhere cranberries and chia to the surface of the bars. If the mixture is too wet, your batter will never gel into a bar (it will end up like a blob of cookie dough – yummy but a bar it will never be).  If you find yourself in the latter situation, you can add some dry nuts/seeds to the mix.

 
Meanwhile, place a piece of wax or parchment paper into a loaf pan (the pan should be in the range of  8″ x 4″) such that it hangs over the sides.

Remove mixture from blender and press it into the base of the loaf pan using the back of a spoon or other implement to flatten and smooth it down.


Sprinkle the surface of the mixture with cranberries and remaining Tbsp of chia seeds, pressing down gently with your fingers so that they adhere to the surface.


Fold both sides of the hanging wax or parchment paper inward, one at a time, over the mixture and gently press down one last time with your hand on top of the paper resting over the mixture.

Place the pan in the fridge and allow the mixture to gel somewhat into a singular slab for about 1 hour or so.  If you wish to accelerate the process, you can pop the pan in the freezer for 30 minutes or so and return it to the fridge.

When you’re ready to slice the bars, simply remove the pan from the fridge and gently elevate the slab by pulling up on the ends of the wax/parchment.


Slice the slab into bar shapes or squares as desired.  Store any remaining portions in the fridge.

Happy Friday everyone, I’m going to be taking some time off to enjoy the March break with my family next week.  See you again soon.

Filed Under: Breads Muffins and Loaves, Breakfast, Snacks and Dessert

Homemade Beaver Tails (A Canadian Classic gets a little makeover)

February 19, 2013 By kelly / inspired edibles 52 Comments

homemade beavertails_inspired edibles


The recipe featured in this post is my own version and does not in any way reflect the official BEAVERTAILS® recipe 

———————-

I couldn’t let another winter go by without dedicating a post to our beloved national treasure: the beaver tail.

That’s right.

Now I’ll admit that the process nearly killed me. I don’t think I’ve ever spent as much time nor created as many versions of a food item in my life (a fine baker and pastry maker I am not).  But in the end, I ended up with something not entirely dissimilar in taste and appearance to the Canadian winter classic! (or so I like to think).

…

Read More »

Filed Under: Festive, Snacks and Dessert

DIY Chocolate Fondue for Two

February 12, 2013 By kelly / inspired edibles 21 Comments

No fancy fondue pot?  No problem.

Enchant your Valentine with this delightful homespun chocolate fondue for two. Adorable and fully portable (oh, the places you’ll go!), it makes its home in a humble muffin tin.

Sometimes it only takes the smallest departure from the ordinary to make a moment memorable. I’m always tickled by the magic of a thoughtful gesture and delight in the unexpected.  I think that’s what grabs me the most about this idea – it’s so simple yet unconventional.  Fun and playful without any fuss or pretense.  I hope you like it too!

Be sure to read the notes section below for best results.

DIY Chocolate Fondue for Two

Ideas for the the Fondue Base ~ (when melted, each of these options should fill 2 medium-sized muffin cups):
  • 100 grams (roughly 1 cup) 75% cocoa chocolate, chopped 
  • 100 grams (roughly 1 cup) Carob chips
  • 100 grams (roughly 1 cup) milk chocolate, chopped
  • 100 grams (roughly 1 cup) white chocolate, chopped
~~~~~~~

Ideas for varying the Flavour of the Fondue Base:
  • For mint chocolate: add 1/2 tsp natural peppermint extract
  • For vanilla chocolate: add 1 tsp vanilla extract or the contents of a vanilla pod
  • For a spicy Mexican version: add 1/2 tsp red chili pepper flakes or ancho chili powder
  • For a zesty version: add 1 Tbsp of orange zest (works particularly well with chocolate) or try lemon/lime zest
  • For a java version: add a pinch of espresso powder
  • For a matcha (green tea) version: whisk in a pinch of matcha powder
  • For a boozy version: add 2 tsp or so of liquor of choice such as: Bailey’s Irish Cream, Grand Marnier or Amaretto 

~~~~~~~~

Ideas for Dipping ~ aka: ‘The Dippers’:
  • Any variety of fresh fruit – look out for some original additions with wow factor – star fruit (carambola) and dragon fruit are always fun!
  • Mini marshmallows (I have never been a fan but some enjoy)
  • Chunky pieces of cheese – if you like the combination of cheese and chocolate, a soft cheese like Brie might be especially nice here 
  • Salted pretzels
  • Biscotti
~~~~~~~~
Notes:

Because the melted chocolate will sit without a heat source in this case, it will not stay liquid as long as it would if lit by a flame or candle.  You will still have time to enjoy your chocolate fondue but you won’t be able to let it linger, as it were, without it solidifying on you.  You can use a silicone lined muffin cup for the chocolate and that way, once it solidifies, you can simply pop the block of chocolate out and back in the pot to reheat if you wish.  (You will never get solidified chocolate out of a non-lined muffin cup I’m afraid – not without scratching the heck out of your tin anyway, and even that would be a stretch).I like to use a quality dark chocolate as the base of my chocolate fondue (generally 75 % cocoa) but if you’re unaccustomed to dark chocolate, you can use a lower cocoa percentage or add some milk chocolate chips or squares to the dark chocolate to reduce the bitterness factor and add a little sweetness.

If you know your sweetie loves white chocolate, why not fill a cup with melted white chocolate and another with dark/milk chocolate.  There’s no reason you can’t use a 12 cup muffin tin here! ;o).

Carob is another option.  It is a caffeine free substitute that can also be used in place of chocolate.  It does not melt as effortlessly as chocolate however but with the addition of some coconut oil and a gentle heating system, (double boiler is most often recommended), it is possible to achieve good results.

Directions:

Peel and chop fruit into bite sized pieces (you can do this the night before and store in the fridge until show time).  Assemble any other desired dippers.

If you are planning on doing several varieties of chocolate and flavorings, you may wish to use multiple pots (you can leave the clean-up for morning ;0).  Or, you can do your flavour mixes in the muffin cups themselves.

When you are ready to go, place chocolate of choice in a small sturdy pot on the stove over lowest heat.  Allow chocolate to melt, stirring to assist.

Once the chocolate has melted, carefully add flavour enhancers of choice to the chocolate.

Using a 6 or 12 cup muffin tin, fill one or several cups with chocolate varieties and remaining cups with fruit and other dippers of choice.

Relax. Recline. Enjoy.

Here’s to your Happy Healthy Hearts!

Filed Under: Festive, Snacks and Dessert

Protein Quinoa Muffins with Fresh Apricot, Walnut and Dates (Gluten Free, Dairy Free)

February 5, 2013 By kelly / inspired edibles 47 Comments

You can’t see me right now but I’m doing a little February happy dance.

That’s right.  We’ve turned the corner on the longest and coldest (let’s hope) month of the year and that’s cause enough for me to engage is some celebratory toe tapping.  But just wait until spring arrives, when things really get afoot.  (cue the groans).

I haven’t posted a muffin recipe in ages!  It seems that energy bars have taken over as the favored lunchbox snack in this house over the past year or so and I’ve been making endless variations of this simple recipe. Still, there’s just something about cranking up the oven on a dark February morning and smelling the aroma of home baked goodness wafting through the air that’s really hard to beat. Plus, a little change now and then is always a good thing.

These quinoa muffins are not only delicious and moist, they are also packed with nutritious ingredients to get your day off to a good start.

You can easily double the recipe and pop whatever you don’t need in the freezer. Thaw muffin/s in the fridge overnight and warm in the oven for 5 minutes or so and you’ve got a healthy, warming, winter’s breakfast to go!

Protein Quinoa Muffins with Fresh Apricot, Walnut & Dates

  • 1 + ½ cups quinoa flour
  • 1/3 cup packed ground walnut
  • 3 tsp baking powder
  • 2 tsp cinnamon
  • 1/3 cup pitted dates, finely chopped
  • 1/4 cup coconut palm sugar, substitute a coarse grain sugar
  • 1 cup fresh apricot, chopped
  • 2 large or 3 medium size bananas, mashed + 12 slices for topping
  • 1 tsp vanilla
  • 2 eggs, gently beaten
  • 1/2 cup coconut milk
  • 1/4 cup olive oil 
  • 1/4 cup quinoa flakes for topping
  • 1/4 cup pepitas for topping

~~~~~~

Notes:

Many large grocers now stock a variety of flours and sugars however you can also find these items at health food stores.

I use a dedicated coffee grinder to grind nuts and seeds because my large blender is not effective in the least at this task (I’m overdue for a multi-function blender upgrade) but, in the meantime, the coffee grinder works pretty well for me.

~~~~~~

Directions:

Makes 12 regular sized muffins

Heat oven to 400 F.

In a large bowl, combine quinoa flour, ground walnut, baking powder, cinnamon, dates and palm sugar, mixing to combine.  Add the fresh apricot and mix gently taking care not to mash the fruit.

In a separate smaller bowl, combine the bananas, vanilla, eggs, coconut milk and olive oil, mixing well to combine.

Add wet ingredients to dry, mixing just until combined.

Divide batter among 12 paper-lined muffin cups that have been dabbed with olive oil.  Place a slice of banana in the center of each muffin and sprinkle with pepitas and quinoa flakes.

Cook for approximately 20 minutes or until muffins are cooked through.

Allow muffins to cool on a rack for 10 minutes or so before enjoying.  (I sprinkled a few more quinoa flakes on top of the muffins for presentation).

Store muffins in the fridge for up to 3 days or in the freezer for a month or so.


Filed Under: Breads Muffins and Loaves, Breakfast, Snacks and Dessert

  • « Previous Page
  • 1
  • …
  • 6
  • 7
  • 8
  • 9
  • 10
  • …
  • 13
  • Next Page »

Search

Subscribe to Inspired Edibles via Email

Say Hello!

  • Facebook
  • LinkedIn
  • Pinterest
  • Twitter
Visit Kelly Mulcair / Inspired Edibles's profile on Pinterest.

Recent Posts

  • New Moon Intentions

    New Moon Intentions

    April 26, 2025
  • Sleep Solutions for Sensitive Souls (Full Moon Edition!)

    Sleep Solutions for Sensitive Souls (Full Moon Edition!)

    April 10, 2025
  • Elderflower Mocktail

    Elderflower Mocktail

    March 13, 2025
  • Winter Citrus Salad with Shaved Fennel & Castelvetrano Olives

    Winter Citrus Salad with Shaved Fennel & Castelvetrano Olives

    January 25, 2025
  • Winter Flourish Bowl

    Winter Flourish Bowl

    January 4, 2025

Copyright © 2025 Inspired Edibles, All Rights Reserved